
In this article, we’ll gain a basic understanding of Entity Framework Core and demonstrate how it streamlines the process of connecting databases to your web pages. You’ll also find step-by-step instructions to help you get started, regardless of whether you’re a Windows or Mac user. Since I’m a Mac user, most of the screenshots in this tutorial will be from a Mac system.
What is Entity Framework Core? #
Entity Framework Core (EF Core) is an open-source and lightweight framework developed by Microsoft. It is widely used in .NET applications to help developers interact with relational databases and convert data into entity classes in a more object-oriented manner. This tool also enables automatic generation of Razor pages with accessible data and default layout settings.
You can install EF Core on NuGet public domain to your web application projects in Visual Studio.
Prerequisites #
- Installed Visual Studio and MySql Workbench
- Connect to local instance in MySql and ensure the server status is Running
- A populated database to be converted to classes and displayed on web pages
- In my case, I created a new scheme named StudentRecord and ran the sql file StudentRecordDBBuilder.MySQL.sql to populate it
- Basic knowledge about ASP.NET and Razor Page
Procedures #
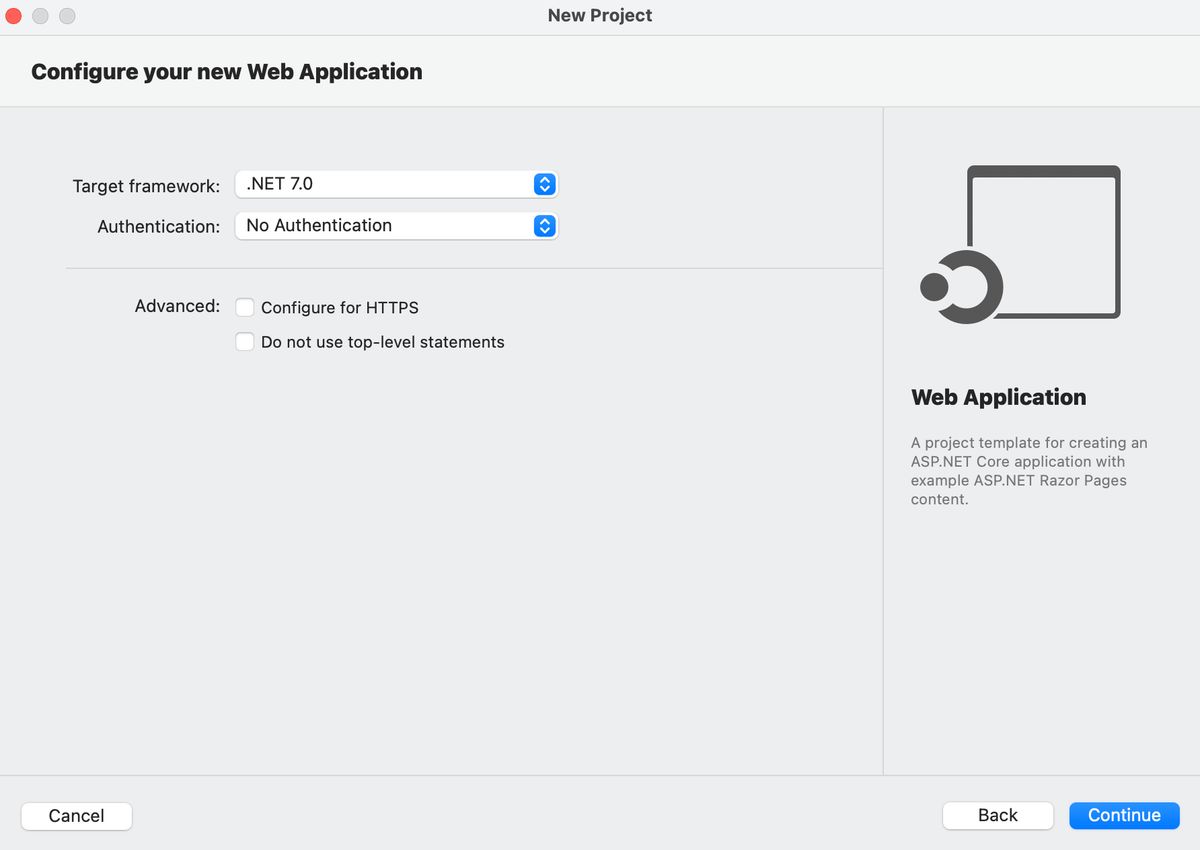
1. Create a new ASP.NET Razor Page #
- Choose the Web Application template for creating an ASP.NET Core application with example ASP.NET Razor Page content
- Select .NET 7.0 as the targeted frame
- Uncheck Configure for HTTPS
- Name the project and solution as you prefer, and place the folder in a location that best suits you
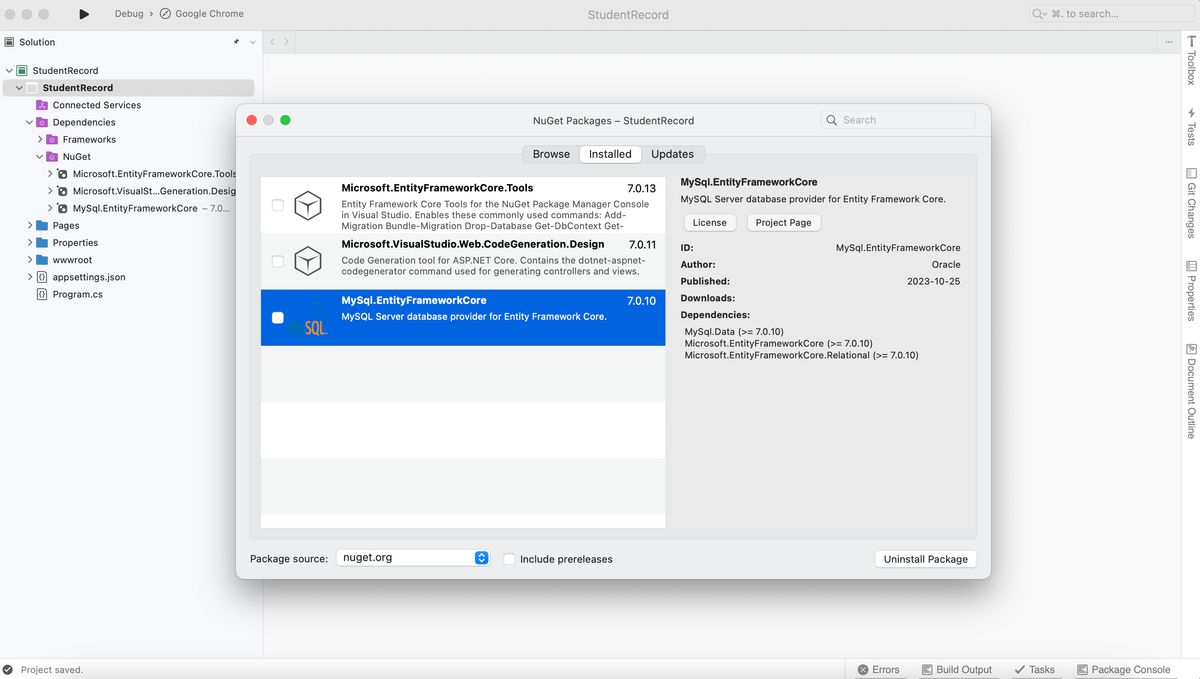
2. Install Microsoft Entity Framework Core #
- Right click on the project folder and select Manage NuGet Packages
- Select Browse tab, and select nuget.org as the package source. Search and install the following three packages to the project. You may need to click Accept if a License Acceptance window pops up.
- MySql.EntityFrameworkCore
- Microsoft.EntityFrameworkCore.Tools
- Microsoft.VisualStudio.Web.CodeGeneration.Design
- Double check whether these three packages are installed successfully by expanding the project’s Dependencies and Packages or browsing the Installed tab in the NuGet Packages Manager’s window
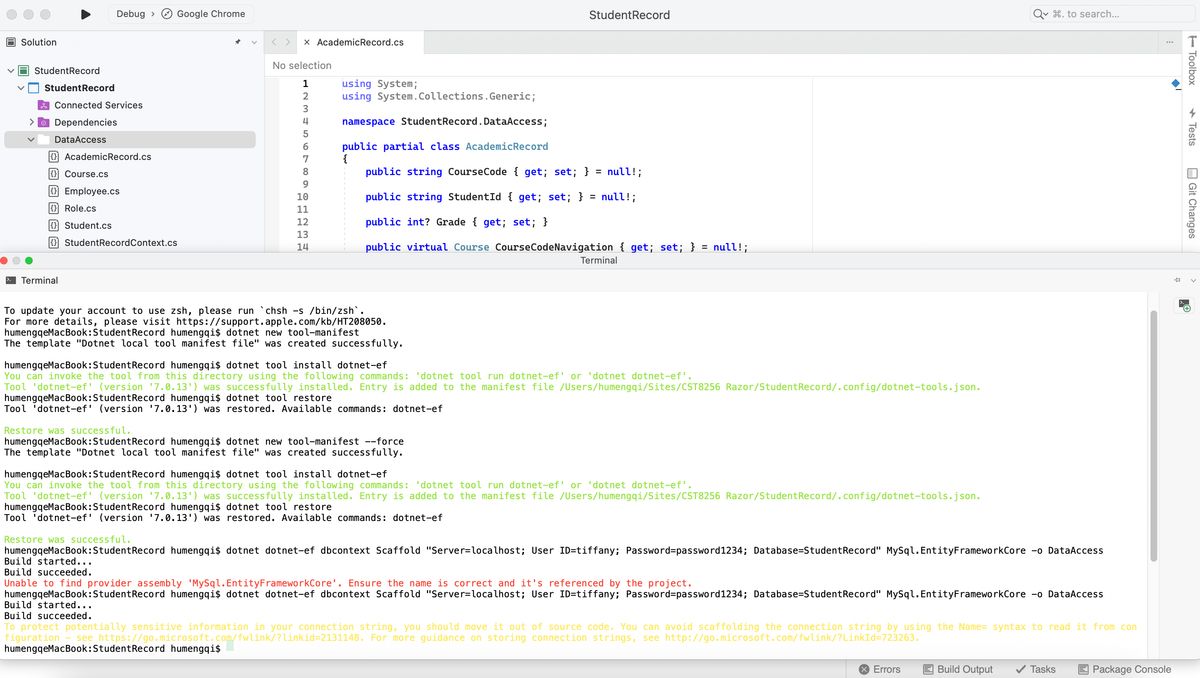
3. Generate entity classes from the database #
- Create a folder DataAccess in the project to contain the generated classes
for MacOS #
- Select Show Terminal Window from Tools in the menu if the terminal window is hiding
- Run the following commands in the VS terminal window:
- to create a new Tool Manifest:
dotnet new tool-manifest - to install dotnet-ef:
dotnet tool install dotnet-ef - to make the dotnet-ef command available:
dotnet tool restore - to generate classes for each tables in the database and the DataContext class:
dotnet dotnet-ef dbcontext Scaffold "Server=localhost; User ID=root; Password=yourPassword; Database=yourDatabaseName" MySql.EntityFrameworkCore -o DataAccess
- to create a new Tool Manifest:
for Windows #
- Select NuGet Package Manager from Tools in the menu and start NuGet Package Manager Console
- Run the following command with your own credentials:
Scaffold-DbContext “Server=localhost; User ID=root; Password=yourPassword; Database=yourDatabaseName” MySql.EntityFrameworkCore -o DataAccess
- By finishing the above steps, the Entity Framework scaffold tool will generate a set of class files in the DataAccess folder
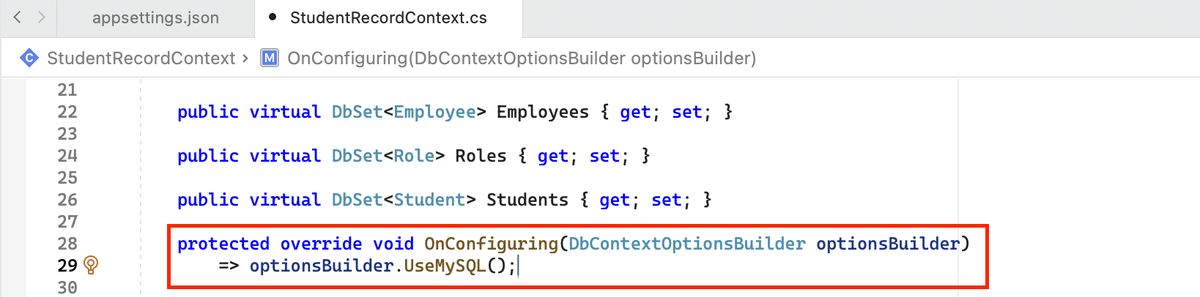
4. Modify the DB connection string #
- Add a ConnectionStrings section with one connection string using the same name of your database in the application’s configuration file appsetting.json

- Remove the hardcoded connection string in the DB Context Class file, e.g. StudentRecordContext.cs
5. Register the DB Access Service #
- In the Program.cs file, add the following statements to the beginning:
using Microsoft.EntityFrameworkCore;
using <ProjectName>.DataAccess;
- In the same file, add the following codes after builder.Services.AddRazorPages( ):
string dbConnStr = builder.Configuration.GetConnectionString("StudentRecord");
if (dbConnStr != null)
{
    builder.Services.AddDbContext<StudentRecordContext>(
        options => options.UseMySQL(dbConnStr));
}

- Select Rebuild Solution from Build in the menu and ensure that the solution build successfully
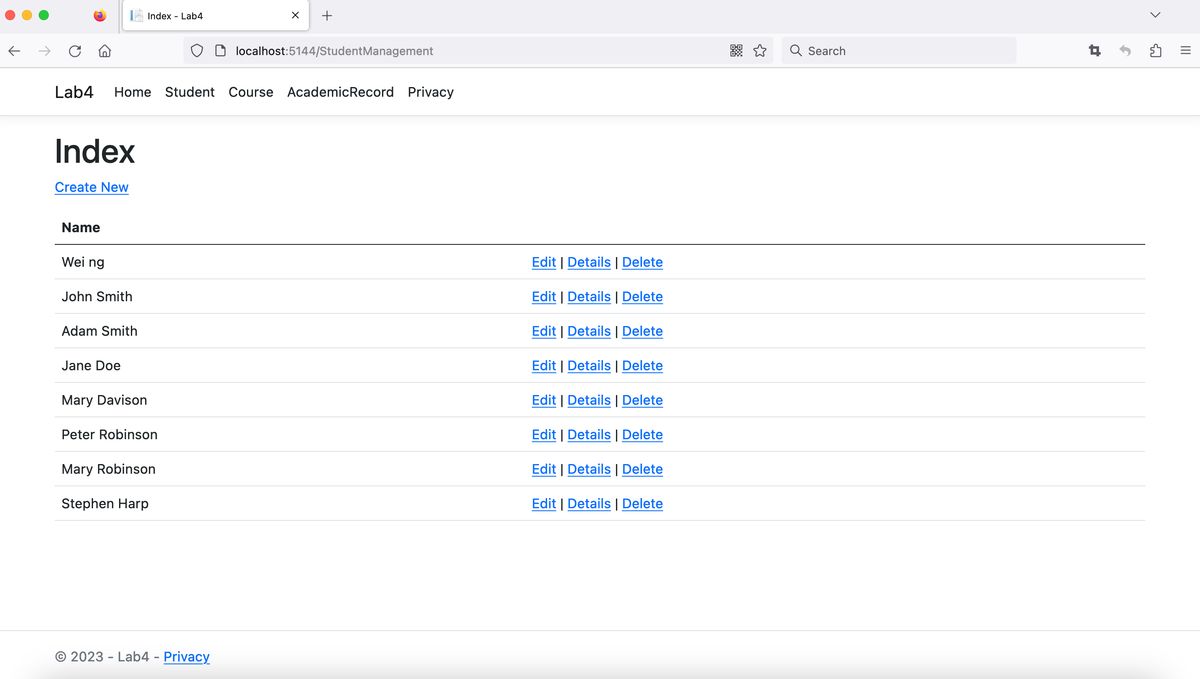
6. Generate Razor pages using CRUD #
- Add a new folder inside the Pages folder, right click on the folder and select Add > New Scaffolding
- Select Razor Pages using Entity Framework (CRUD) and choose the corresponding model class and data context class you’d like to apply

- By finishing the above steps, the CRUD Razor pages are already generated inside the folder
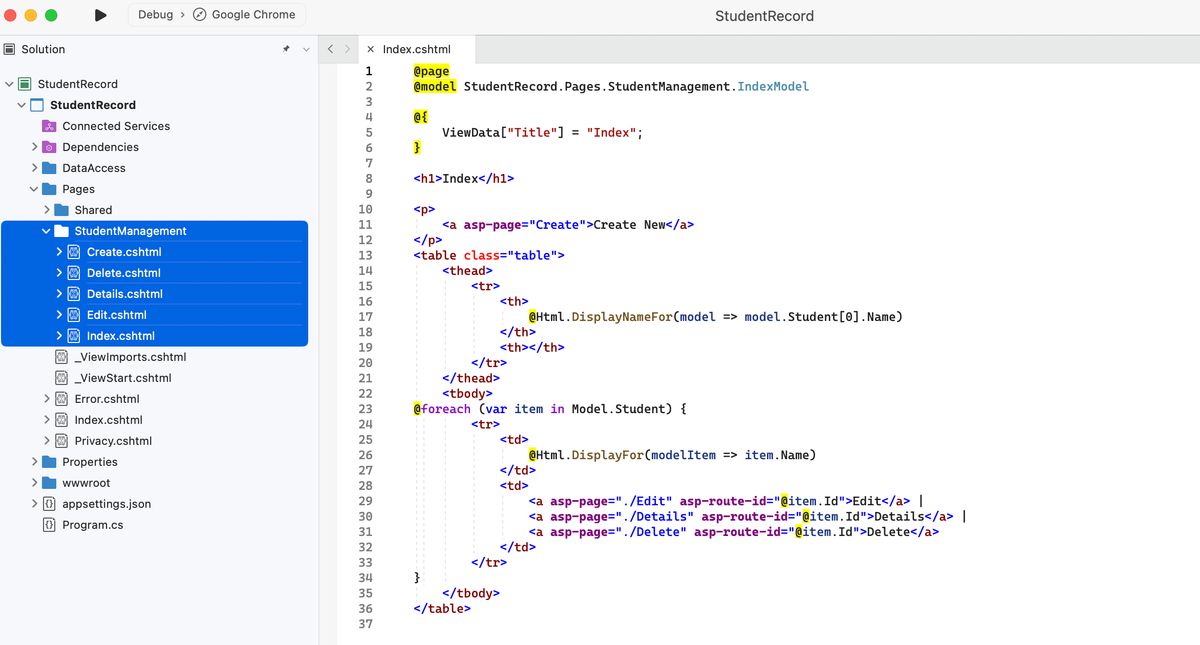
7. Review and modify the pages #
- In the _Layout.cshtml page, add menu items in the navbar to access the newly generated pages from the index page
- Run the application and view the pages in browser
Common Errors #
Debugging is a common practice in application development. One of my biggest challenges in this project is running the Scaffold command. I’ve listed a few errors that I encountered and their respective solutions below.
1. Unable to find provider assembly ‘MySql.EntityFrameworkCore’
I re-installed ‘MySql.EntityFrameworkCore’ with a different version(7.0.5) and forgot to update it. Rebuild the solution will solve this issue.
2. Missing required argument ‘<Provider>’
Double-check the quotation marks in the command. In my case, I mistakenly used Chinese quotation marks.
3. Authentication to host ’localhost’ for user ‘root’ using method ‘caching_sha2_password’ failed with message: access denied for user ‘root’@’localhost’ (using password: yes)
If you are absolutely certain that you are using the correct password, it’s likely that a special character in the password is causing confusion in the terminal/console. You can change the password to a simpler one or create a new temporary user with all privileges and try again.
Credit #
This blog is inspired from a lab assignment of the course CST8256 Web Programming Language I, with an original instruction written by Wei Gong.